No Bake Chocolate Fudge Recipe – The Easiest 4 Ingredient Chocolate Fudge
No Bake Chocolate Fudge is the ultimate treat for chocolate lovers who crave something decadently rich, silky smooth, and unbelievably simple to make. This fudge delivers intense cocoa flavor without ever turning on the oven. One bite melts luxuriously on your tongue, combining creamy sweetness with deep dark chocolate richness and optional nutty crunch. It’s thick, glossy, soft-set, and addictive—exactly the kind of dessert that disappears fast at parties, holidays, and late-night cravings. What makes this recipe irresistible is its simplicity, foolproof method, and premium flavor profile. You don’t need baking skills, special equipment, or long prep time. Just melt, mix, chill, slice, and indulge. This recipe is loved because it delivers bakery-quality fudge at home with minimal effort and maximum reward.
Why This Recipe Is Irresistible
- Requires only 4 main ingredients
- No baking and no candy thermometer needed
- Deep dark chocolate flavor balanced by creamy sweetness
- Perfect holiday dessert and edible gift idea
- Ultra-smooth, thick, and fail-proof texture
Ingredients & Their Roles
- Dark Chocolate (350g / 2 cups, chopped) – This is the heart of the fudge, providing bold cocoa intensity, structure, and the melt-in-your-mouth base. Dark chocolate contains less sugar and more cacao solids, which results in a more luxurious fudge that sets perfectly without baking. High-quality chocolate guarantees a glossy finish and prevents graininess.
- Condensed Milk (400g) – Acts as the sweetener and binder. Because it’s already cooked, reduced, and thickened, condensed milk creates a smooth, creamy texture without requiring additional heating or sugar melting steps. It balances the bitterness of dark chocolate and gives the fudge its soft, sliceable consistency.
- Salted Butter (2 tbsp, melted) – Adds richness, smoothness, and shine. Butter introduces fat that enhances mouthfeel, prevents chocolate from hardening too firmly, and gives the fudge a creamy finish. The salt intensifies the chocolate flavor and creates a premium sweet-salty balance that makes every bite more addictive.
- Walnuts (¼ cup, optional) – Provide texture contrast, mild bitterness, healthy fats, and earthy flavor that complements dark chocolate. Walnuts elevate the fudge into a gourmet-style dessert. You can substitute with pecans, almonds, or hazelnuts for different flavor profiles.
Step-By-Step Instructions
- Prepare the pan – Grease a square or rectangular pan lightly with butter. Line it with parchment paper, leaving parchment handles on both sides for easy lifting later. This prevents sticking and ensures clean, professional cuts.
- Melt the chocolate – Create a double boiler by placing a heat-safe bowl over simmering water. Add chopped chocolate and stir gently until fully melted and smooth. Remove from heat immediately to avoid burning or overheating.
- Mix the fudge base – Pour in condensed milk and melted salted butter. Stir continuously until the mixture becomes thick, smooth, and uniform. The texture should resemble soft brownie batter—rich and glossy.
- Add nuts for crunch – Fold in walnuts if using. Stir just enough to distribute evenly without overmixing.
- Pour and smooth – Transfer mixture into the prepared pan. Use a spatula to flatten the top for a clean surface. This helps create visually appealing, even fudge squares.
- Chill to set – Refrigerate for 3–4 hours or until firm. Do not rush this step. Proper chilling ensures the fudge slices without crumbling.
- Slice into squares – Lift fudge out using parchment handles. Place on a cutting board. Use a warm knife (dip in hot water, wipe dry) for perfect clean cuts.
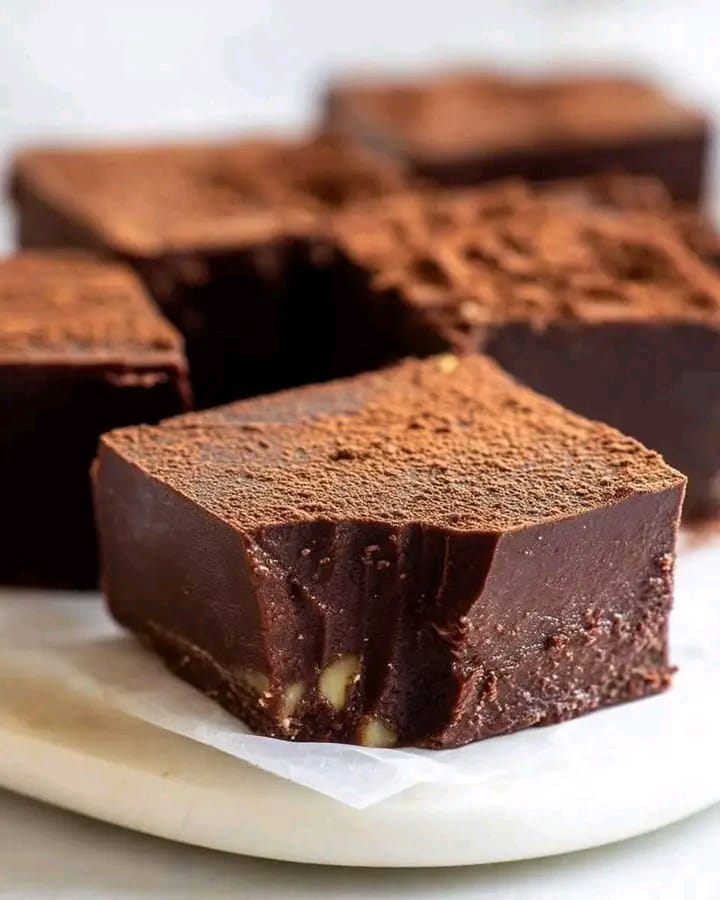
- Optional cocoa dusting – Lightly dust with cocoa powder for added aroma, visual appeal, and gourmet finish.
- Enjoy! – Serve immediately or store chilled.
Pro Tips for Perfect Fudge Every Time
- Use high-cacao dark chocolate (70%+ recommended) for best flavor and setting structure.
- Chop chocolate finely so it melts evenly and quickly.
- Do not overheat chocolate—excess heat can cause seizing or texture issues.
- Stir with patience to emulsify the condensed milk and butter into the chocolate.
- For extra shine, tap the pan lightly after pouring to remove air pockets.
- Slice only when fully set using a warm knife.
Serving Suggestions
Serve your Chocolate Fudge Squares with a cup of strong espresso, hot cocoa, or vanilla milk to balance sweetness. For a dessert board, pair with fresh berries, sliced bananas, salted caramel drizzle, or whipped cream. You can also crumble pieces over ice cream, sandwich between cookies, or pack into gift boxes with wax paper dividers for a luxurious homemade present.
Storage Instructions
Store in an airtight container in the refrigerator for up to 2 weeks. Freeze for 3 months and thaw before serving for best texture.
Conclusion – A Decadent Treat Made Effortlessly
This No Bake Chocolate Fudge Recipe proves that indulgence doesn’t need to be complicated. With only a handful of ingredients and a simple chilling process, you get rich, creamy, bakery-style fudge that tastes premium and homemade. It’s a quick chocolate dessert, a holiday showstopper, and an easy edible gift that anyone can make. Silky chocolate, creamy sweetness, and optional crunchy walnuts create a flavor experience that feels luxurious yet effortless. If you’re looking for the most delicious, beginner-friendly fudge recipe that sets perfectly without baking, this is it.
Simple. Creamy. Chocolate-Packed. No Oven Needed. Make it once, and it becomes your forever recipe.